
Get The Fuck Out
Shop and garage tricks so good you say it out loud. Zip ties, scribing, improvised tools and more.
Zip Tie Tricks
26 rules Tuan CT
Lash a crossed joint
Run the tie diagonally across the X — over one member and under the other — then cinch, so the diagonal wrap clamps the crossing and stops it pivoting.
 Carl's Creative Corner
Drilled-hole cable mount
Drill a hole beside the run (or two holes, one each side), feed a zip tie through, wrap it around the conduit and cinch — you get an anchored clamp anywhere you can drill.
 DaveHax
Bundle and comb cables
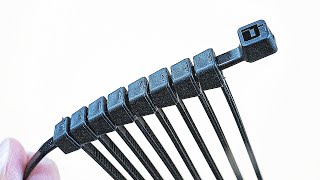
Group cables with zip ties into one loom — and where you need to identify individual runs, link several ties into a flat comb so each wire sits in its own channel.
 Workshop Maker
Splice two cords
Overlap the two cord ends and bind them together with a zip tie so the join stays slim enough to feed through a guide or eyelet.
 The No Way Guy
Reuse a zip tie
Slip a thin blade or pin under the locking pawl inside the zip tie head to release the ratchet, and the tie backs out undamaged.
DaveHaxZip-tie jar opener
Loop a zip tie around the lid, cinch it tight, and pull the tail as a lever — you get grip plus leverage instead of just squeezing harder.
Layout & Joinery
10 rules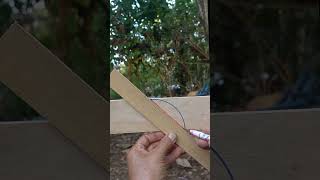 Letterman Mebel
Square with a rope
Use a rope or thin strip as a compass to strike two equal arcs from points on your baseline; the line through where the arcs cross is a true perpendicular.
 Welderman
Scribe a corner brace
Lay the brace stock across the corner in position, scribe where it crosses each frame member, and cut on those lines instead of calculating the miter.
 Chop Science
Scribe an odd angle
Hold both boards in their final positions, overlap them, and scribe the joint line directly off the parts instead of measuring the angle.
 Construção e Transformação
Mitered deck border
Run a picture-frame border around the deck and cut the corner miter with a circular saw on the boards in place, so the joint closes on the real corner instead of a nominal 45°.
 The No Way Guy
Tape measure, second job
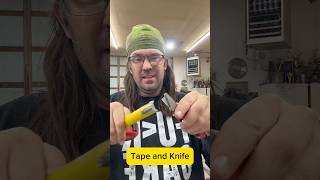
Use the serrated scribing edge on the tape's hook to score a mark, and use the extended blade as a stiff straightedge to guide a knife for a quick straight cut.
Custom arch by batten
Loft the arch full size, bend a thin plywood batten through your two spring points and the peak, and trace along it — the bent strip finds a fair curve on its own.
Tool Hacks & Improvised Tools
10 rules ToolerHacks
Jigsaw → mini bandsaw
Mount a jigsaw blade-up under a small table and back the blade with a bearing guide — it becomes a mini bandsaw, and the rear bearing stops the blade wandering.
 ToolerHacks
Kerf-slot tool rack
Cut a row of evenly spaced saw kerfs across the top of a wood block and drop each tool shaft into a slot so it hangs by its handle.
 The No Way Guy
Make snap ring pliers
Grind small points onto the tips of a cheap pair of needle-nose pliers so they seat in the snap ring eyelets — you've made snap ring pliers.
 The No Way Guy
Tap in a socket
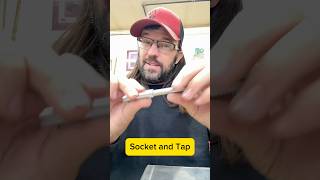
Drop the tap's square shank into a snug-fitting socket and turn it with a ratchet or breaker bar when you have no tap wrench.
 The No Way Guy
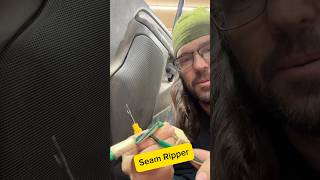
Seam ripper depin
Use a sewing seam ripper to lift the locking tab — its fine hooked point slips under the tab so you can back the terminal out without breaking the housing.
 The No Way Guy
Sandpaper grip
Put a small piece of sandpaper grit-side down between the driver bit and the stripped screw — or between the wrench jaws and a rounded nut — and the grit bites enough to break it loose.
Garage & Automotive
12 rules The No Way Guy
Read a blown fuse
Pull the fuse and look through it at the metal link — a clean unbroken strip is good, a broken or cloudy one is blown. If you're not sure, check continuity across the caps or blades.
 The No Way Guy
Stuck or rounded lug nut
Use a 6-point impact socket, never a 12-point. If it's already rounded, hammer a slightly undersized 6-point socket onto it and drive it off with the impact.
 The No Way Guy
Spring hose clamp pliers
Grip the clamp tangs with hose-clamp or slip-joint pliers, squeeze to release, and slide the clamp along the hose — a plier handle end can start or seat one where your fingers won't fit.
 The No Way Guy
Spring clamp fork trick
Straddle the clamp ear with the tines of a metal fork, squeeze to compress the band, and walk the clamp along the hose where pliers won't fit.
 The No Way Guy
Reverse the ball mount
Flip the ball-mount and slide it into the receiver reversed — it tucks the drawbar in so it sticks out less, and it turns a drop into a rise.
 The No Way Guy
Heat a plastic dent out
Warm the dented or bowed plastic with a torch or heat gun, keeping the heat moving, until it softens enough to push the shape back — then hold it there while it cools.
Materials, Paint & Adhesives
10 rules Alley Picked
ATF + acetone penetrant
Mix roughly equal parts automatic transmission fluid and acetone for a cheap penetrating oil — the acetone carries the ATF into the rust, then flashes off and leaves the oil behind.
 The No Way Guy
Wire nut caulk cap
Twist a wire nut onto the cut nozzle of a caulk, silicone or adhesive tube — it caps and seals out air, and the cone inside holds the bit that would have skinned over.
 Handy Space
Inner tube gasket
A slice of bicycle inner tube is a free rubber gasket — stretch a band over a mismatched neck or rim to seal or adapt one container to another.
 MrVex
MrVexBagged concrete cobbles
Fill small bags with concrete mix and lay them tight in a staggered grid — once cured they set into rounded, river-stone-look cobbles you strip and brush clean.
 Flooring Videos
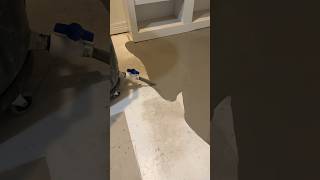
Valve on a trash can
Fit a bulkhead valve near the base of a heavy trash can to turn it into a gravity dispenser you open and close on demand.
Alley PickedNewspaper on glass
Wipe glass and mirrors with crumpled newspaper for a streak-free, lint-free finish.
Shop Setup, Storage & Rigging
10 rules ElectroBOOM
Mount a power strip
Drive two screws at the spacing of the keyhole slots moulded into the back of the strip and hang it on them — or, if there are no keyholes, zip-tie it to a bench leg or cabinet side.
 The No Way Guy
Folding engine hoist
An engine hoist lifts and rolls any heavy object, not just engines — and buying the folding kind means it collapses flat against a wall between jobs.
Alley PickedWood drawer dividers
Cut thin wood strips into custom partitions sized to your actual tools, so everything stays in its own compartment.
 The No Way Guy
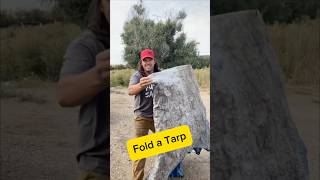
Fold a tarp solo
Fold the tarp down into one long narrow strip on the ground, then roll it tight from one end so it stays folded and packs small.
 The No Way Guy
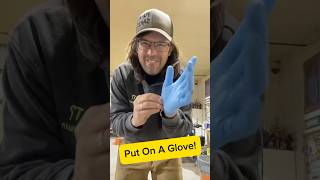
Inflate a tight glove
Blow air into the glove to inflate it first — the puffed-out fingers open up so your hand slides straight in.
 The No Way Guy
Reseal a drink can
The plastic cap off a grease cartridge snaps onto a standard drink can — keep one to reseal an open soda or beer.